Posted on
Installing and configuring PatternLab
In this second instalment of articles about PatternLab, I am going to cover some basics around installation and configuration that can hopefully clear out some confusion that some people have expressed to me recently.
If you want me to cover something more specific, please shout in the comment section or on Twitter.
If you missed it, you can find the previous article here: Introduction to PatternLab, a pattern-driven UI tool.
Here is what I am going to cover:
- Different ways to install PatternLab.
- Files and folders organisation, clearing out the mess.
- Configuring PatternLab.
Most, if not all of the information I am going to cover here is available in the official documentation, and this article should not be a replacement for it.
Different PatternLab Editions
Currently, PatternLab comes mainly in two different flavours:
- a PHP-based one and
- a Node-based one.
They are equally good, and usually, you should base this choice on your experience, tools and requirements, so make sure you understand the PatternLab Ecosystem.
In this article, I am going to talk specifically about the Node version, which you can download with either Gulp or Webpack that Comcast recently implemented and released as Open Source.
There is also a Grunt version, which now feels very much out of date, so I am not going to cover it here in any shape or form.
In case you are not aware, Webpack is a bundler for javascript and many other things. It abstracts a lot of the complexity that tools like Gulp and Grunt previously exposed.
Different ways to install PatternLab
You can install both Gulp and Webpack editions by cloning the repository, by downloading the zip file and extracting it locally, or by installing it as a dependency via npm.
There is no recommended way to do that: in my opinion, it seems the installation as an npm dependency helps with future upgrades and few other things, but leaves a lot to the user to finalise, while the other two methods are perhaps more straightforward, as you would start with an existing directory structure.
Requirements
As you might have guessed the main software requirements are going to be a recent-enough version of Node.js (version 6 or above), which I would recommend installing using nvm, as it allows you to have, different versions of Node.js installed concurrently.
Keep in mind that if you are cloning the repository, you need to update the git remote origin to point to your repository (if you have one):
$ git remote rm origin
$ git remote add origin git://your/repository/git
Moreover, I would suggest keeping an upstream remote so you can update the project. If you are using the Webpack version:
$ git remote add upstream\
git@github.com:Comcast/patternlab-edition-node-webpack.git
If you are using the Gulp version instead, it might come handy installing Gulp 4.0 globally as well:
$ npm install -g gulp/gulp#4.0
Or you can simply add a script for launching PatternLab in package.json:
{
 "scripts": {
    "postinstall": "node scripts/postinstall.js",
    "start": "gulp patternlab:serve",
    "gulp": "gulp"
  }
}
The Webpack version already has all the required scripts configured for you.
Starting PatternLab is then as easy as invoking the following command:
$ npm start
alternatively, if you are using Gulp, with:
$ gulp patternlab:serve
Finding your way around files and folders
The main configuration file is in the root of the application, together with a bunch of default directories that are used by either Webpack or Gulp to find the right files, mangle them and to copy everything over into the public/ directory.
The only directory you need to touch when working in PatterLab is
source.
Within source you can see the following directories:
_annotations_data_meta_patternscssjs
The ones are ultimately interesting for development purposes are _data, _patterns and css for styling your patterns.
Ideally, once you have started PatternLab with the command above, any change within the source folder triggers a re-build of PatternLab and a subsequent refresh or injection of JS or CSS files.
For any additional file, you might need to stop and think how to organise things and how to adjust Webpack or Gulp accordingly.
Let's have a look at these directories a bit more in detail.
_data
In this folder you usually have two files by default:
_data.json: This file is the basic JSON data that contains all the variables that are used by your patterns: from the most generic ones, like dates, names of different length and sentences of short, medium and long length, to name-scoped ones used for specific UI elements in a structured way._listitems.json: this contains some data helpful for looping through and generate different instances of the same UI element. Knowing how to iterate through elements is something that can spare you an incredible amount of work.
You can have an initial look at how to use these two files by looking at the official documentation.
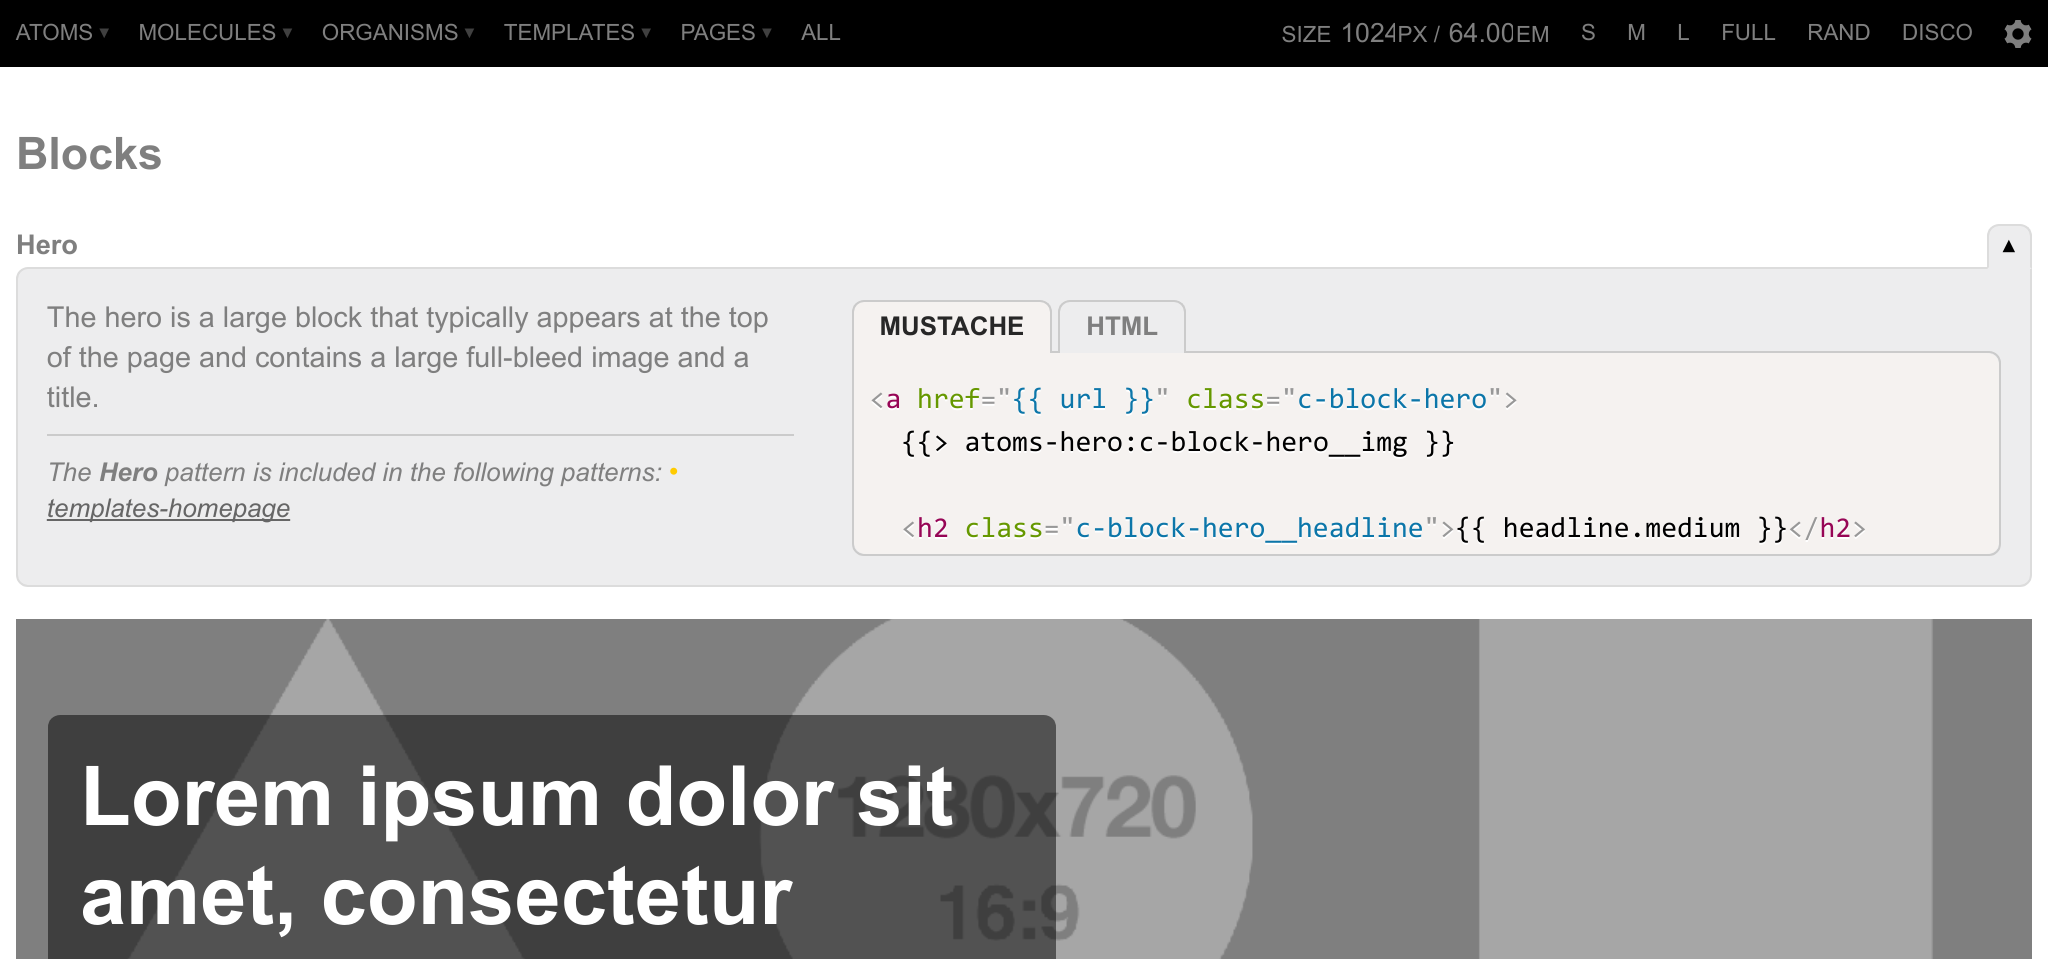
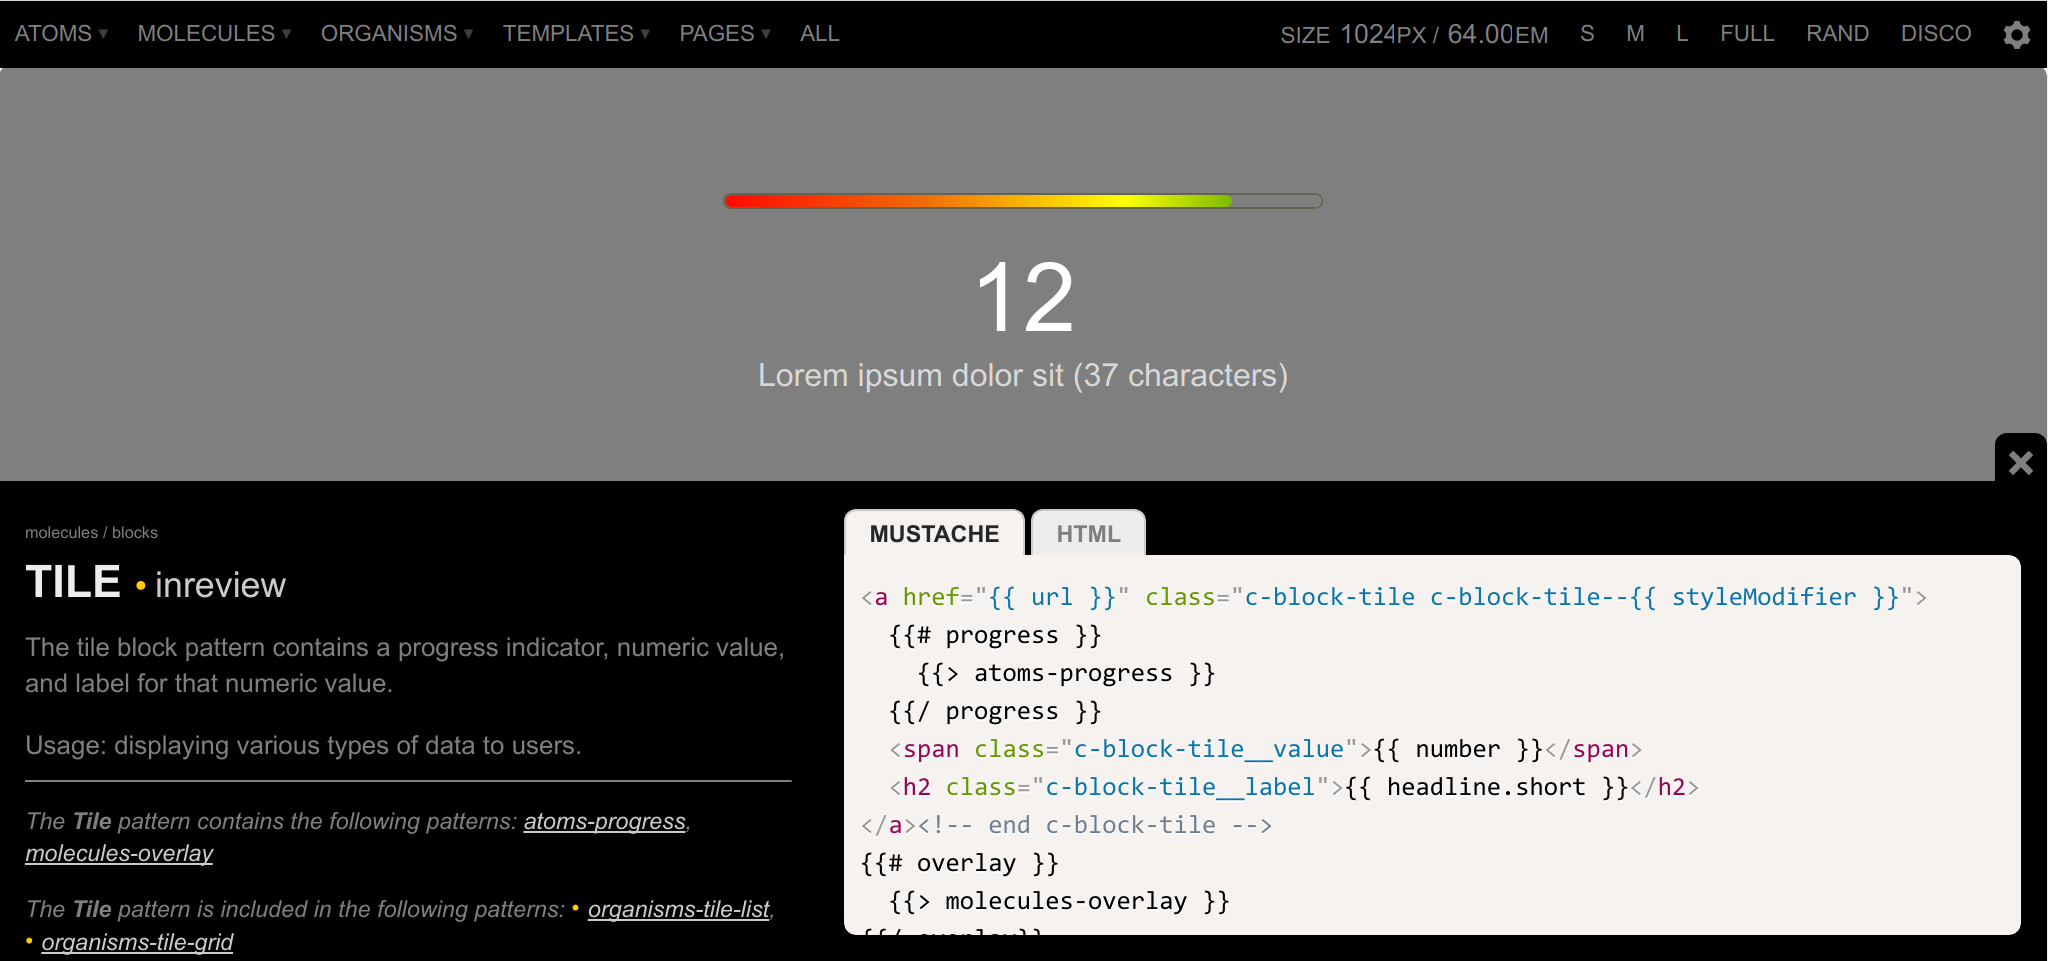
_patterns
All your template files (*.mustache in our case) are going to be stored and organised inside this directory.
The way you organise and name the templates determines the way PatternLab displays and group them in menus and sub-menus.
For instance, the demo website for PatternLab organises them as per Atomic Design principles, but it is very much down to how you feel like it is the right way to organise them.
Briefly, I am going to cover some usually ignored areas, although the official documentation covers them pretty well:
- How "View All" is generated
- Hiding patterns
- How to order patterns and directories
- Linking patterns
- Pattern names expansion and fallback
- Template engines
How "View All" is generated
If you have started playing around with PL you might have noticed two types of links:
- an "All" link at the end of the main menu,
- a "View All" link in some menus.

While the first link is always there, the second link appears when creating submenus only.
If no "View All" links are present, the first one leads you to an empty page, and you might want to change where the default page points to in the configuration file.
This behaviour might sound odd, so let me give you a more practical example using Atomic Design:
Within the Atoms of a website, you might well find <label>s, <input>s, <textarea>s, <button>s.
At the Atoms level your folder structure might look something like:
source/
+-- patterns/
    +-- atoms/
        +-- input.mustache
        +-- label.mustache
        +-- textarea.mustache
        +-- button.mustache
With this structure in place in PatternLab, you might notice that you have to click every time on the menu to move from one Atom to the other.
If you instead group them in a folder, let's call it form, then magically you have the "View All" link generated within the forms entry.
It also means that you can see all the patterns that are in all subdirectories at once, by clicking on the "All" link on the top menu.
This "feature" might well change in the future, possibly giving the developers more granular control on when to add a pattern to the global listing. However, as it is now, it caused me some confusion and took me a while to understand what was going on.
You might also find the opportunity to use this "feature" for something useful, that is being able to exclude some patterns from the "All" listing and having them as separate pages instead, as a generic documentation page could be. As you can see on the PatternLab Demo Website, Templates and Pages menus make use of this feature.
Hiding patterns
The previous method can be somehow a way to hide templates from the global view, allowing them to appear in the menu only.
If you do not want patterns to appearing anywhere, you can do that is just by prepending "_" (the character "underscore") to the file name. For instance, in situations where you want to include templates within other templates and at the same time exclude them from the overall listing and from appearing in the menu at all.
Keep in mind that even so, templates are going to appear in the inclusion list in the "pattern information panel", but clicking on them leads you to an empty page.
How to order patterns and directories
Folders and patterns are ordered by name by default. Changing their order can only be done by prepending a number to the beginning of the folder or the pattern file name.
The numbers will automatically be excluded when displayed in the menu and the various titles of the patterns.
As an alternative method, you can add a variable order to the frontmatter data in the pattern doucmentation file.
Linking patterns
When you start having a good set of patterns, or Organisms in Atomic Design terms, you can start thinking of building fully fledged Templates and Pages.
The ability to create Templates and Pages is particularly useful for:
- showcasing patterns within the context and how they play together with other patterns,
- displaying multiple use case scenarios, e.g. galleries can be seen how they look without any content and with a lot of them, or
- building user journeys.
While the first two are quite easy to achieve with the built-in functionality provided by the template engine (Mustache in our case), you can use the internal linking system provided by PatternLab to achieve the latter, as explained in the documentation.
In conjunction with pseudo-patterns and style modifiers you can create a rich, albeit static, experiences to ensure the user journey covers all possible scenarios.
A proper UX analysis of the user journey is needed as it helps you spot errors or mistakes in the application of the various patterns.
Pattern names expansion and fallback
Together with the above, you need to have a clear understanding of how patterns names are expanded to allow you to include and link to them.
This is quite well explained in the documentation, and it can be summarised as:
[patternType]-[patternName]
Template engines
I am going to expand into much more detail about templates and how to create reusable ones in a future article, but just so that you are aware you can ideally use any templating engine within PatternLab. Both version we are here considering use Mustache as default template engine.
The template engine is a separate dependency of PatternLab, called a PatternEngine.
There are a few more supported, such as
Handlebars, Underscore, Twig and React. These are the officially supported ones, but nothing stops you adding your own PatternEngine as a separate dependency, as it happened with Thymeleaf.
PatternLab enhances Mustache with few additions on top of what the templating engine provides by default, that is, variable expansion, conditional statements, loops and template inclusions.
These are:
- variable loading via JSON,
- in-line template parameters.
These two features of PatternLab allows you to create reusable patterns with little to no effort.
Variables can be automatically loaded via JSON to fill in your patterns, and you can override them granularly: the most global one is the _data.json we talked about earlier, up to the template-name.json and few other alternatives, like pseudo-patterns and style modifiers.
The in-line template parameter allows you to pass variables when including templates, which is not something that is available out of the box with Mustache, with something like:
Being able to understand and use these functionalities can help you create proper reusable templates within PatternLab.
css
This directory contains already one file, called pattern-scaffolding.css, which contains some basic styling for PatternLab.
At this point we need to understand what is the physical output of running PatternLab:
The main window is composed of:
- the top bar, where the top menu and the controls live, and
- the actual content, displayed in an
iframe.
The first interaction with the actual content that is the patterns is via a wrapper, the View All page, or the All page which is the default view we talked about before.
All the styles that you can see in pattern-scaffolding.css apply to this wrapper.
When displayed alone the wrapper disappears, and you are left with your bare template to be displayed.
At this point you need to do your magic: by default, creating a style.css in this same folder allows you to style your components.
PatternLab does not come with any pre- or post-CSS processors because it is made to be flexible and adaptable.
It is mostly a question of being able to adjust Gulp or Webpack and add the right configuration to make it work.
Configuration
Now that we have seen what directories are the most important and what they contain, we can have a quick look at the main features that can configurable in PatternLab.
Within patternlab-config.json you can see a bunch of input (source), and output (public) directories. These variables are available by default in Gulp and Webpack for you to use and extend.
What's perhaps more important, is
- how to configure the top bar controls by toggling the values of the
ishControlsHidevariables, - how to set the max and min size of the resizing iframe by adjusting
ishMinimumandishMaximum, - how to update the generated output, but toggling
cacheBustwhich appends a query string to your CSS and JS files, - how to control the performance of PatternLab, by enabling incremental builds disabling
cleanPublic, - how to control the default look of PL, by configuring
defaultPatternanddeafultShowPatternInfo.
These are just a few you can play around, and usually, the default configuration should be good enough for you.
For more information head over the advanced configuration options documentation page.
Now you are ready to go
At this point, there is very little to talk about regarding features of PatternLab, and I hope this was useful to you.
There are many other areas I have not touched as they seem quite easy to understand and, as pointed out multiple times, the official documentation elaborates on them well enough.
Once again, if you have any questions feel free to hop into the PatternLab Gitter channel or the Design Systems PatternLab channel (#tools-pattern-lab).
Please note
PatternLab Node version 3.0 is almost at the doors. Brian Munzenmeyer, the lead contributor for the project, hopes to get it ready by the end of the year.
With it, a lot of things I have talked about here are going to change, with a simplified/improved configuration and installation strategy, better template engines support, and much more.
I will make sure to revisit this article or write a new one when things will happen.